Below is a comprehensive guide for merchants on how to integrate and implement the Split Payment feature through the Merchant Admin Portal.
Sub-Merchant configuration In Merchant Admin:
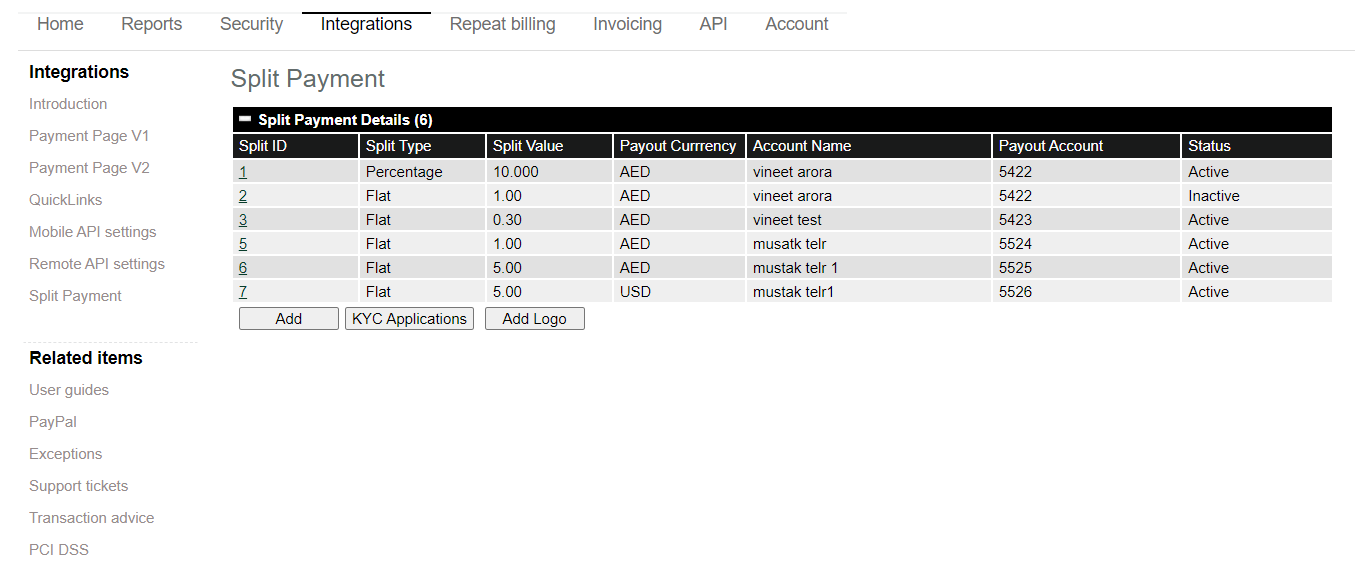
- Once split payment option is enabled on merchant’s store, they will be able to access ‘Split Payment’ button in Merchant admin “Integrations” page
Adding Sub-Merchant:
- Merchants can add Sub-Merchants (Beneficiaries) under the ‘Split Payment’ section of their store.
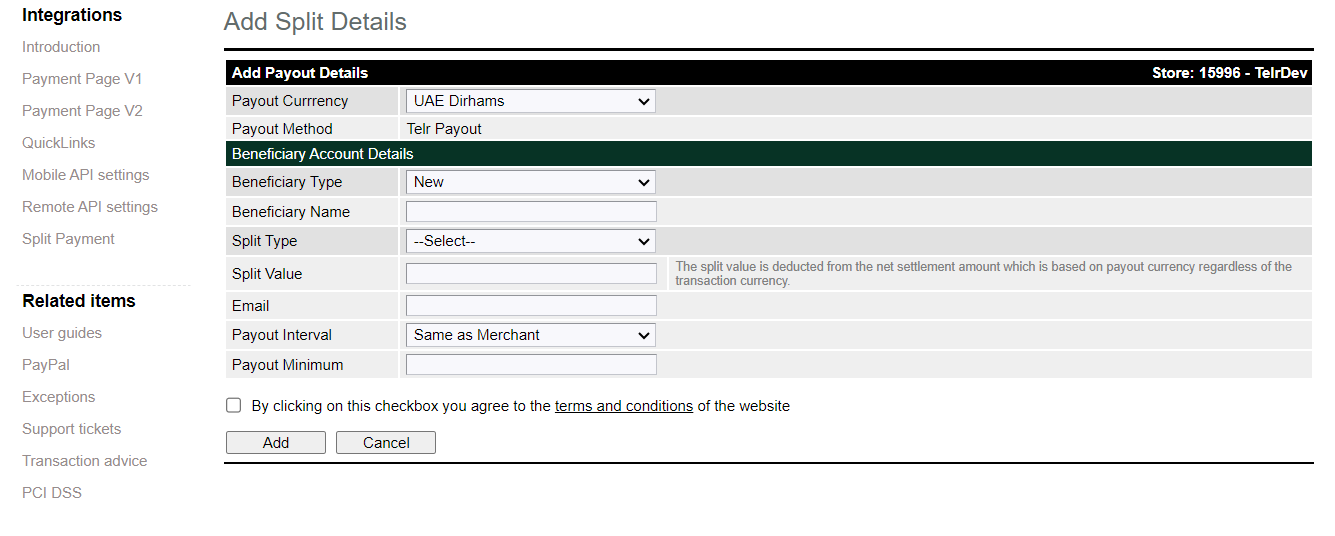
- To add a Sub-Merchant, the merchant will click the ‘Add’ button and fill in the following details:
- Payout Currency
- Payout Method
- Beneficiary Type (New and Existing)
- Sub-merchant Name
- Split Type (Percentage or Flat)
- Split value (Exact value for flat split)
- Email (Sub merchant email ID)
- Payout Interval (Weekly and Monthly)
- Payout Minimum
- Check box for shared details confirmation.
Percentage and Flat Split Validation:
- If the split type is Percentage, the system will ensure the value does not exceed 100%.
- If the split type is Flat, and the amount exceeds the transaction value, the transaction will be blocked.
Notification & Sub-Merchant Approval:
- After submitting the details, a system-generated email is sent to the Sub-Merchant (Email provided in the Sub merchant details).
- The email will contain a link to the Terms and Conditions, which the Sub-Merchant must review and accept.
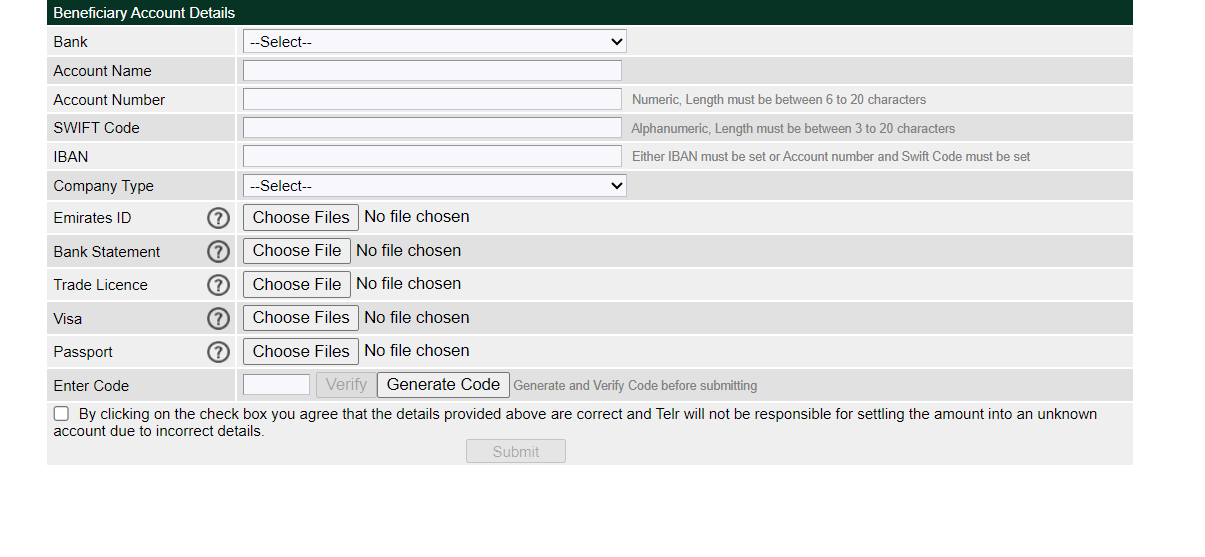
- Upon acceptance, the Sub-Merchant is redirected to a form where they will need to provide the following details:
- Bank Name
- Account Name
- Account Number
- Swift Code
- IBAN
- Company Type
- Emirates ID (No restriction on upload number)
- Bank Statement (Restriction to upload only 1 document)
- Trade Licence (Restriction to upload only 1 document)
- VISA (No restriction on upload number)
- Passport (No restriction on upload number)
- Enter Code (after clicking on ‘Generate Code’ Sub-Merchant will receive code on their email address. They will enter the code and ‘Verify’, after only verifying the code, they can submit the details)
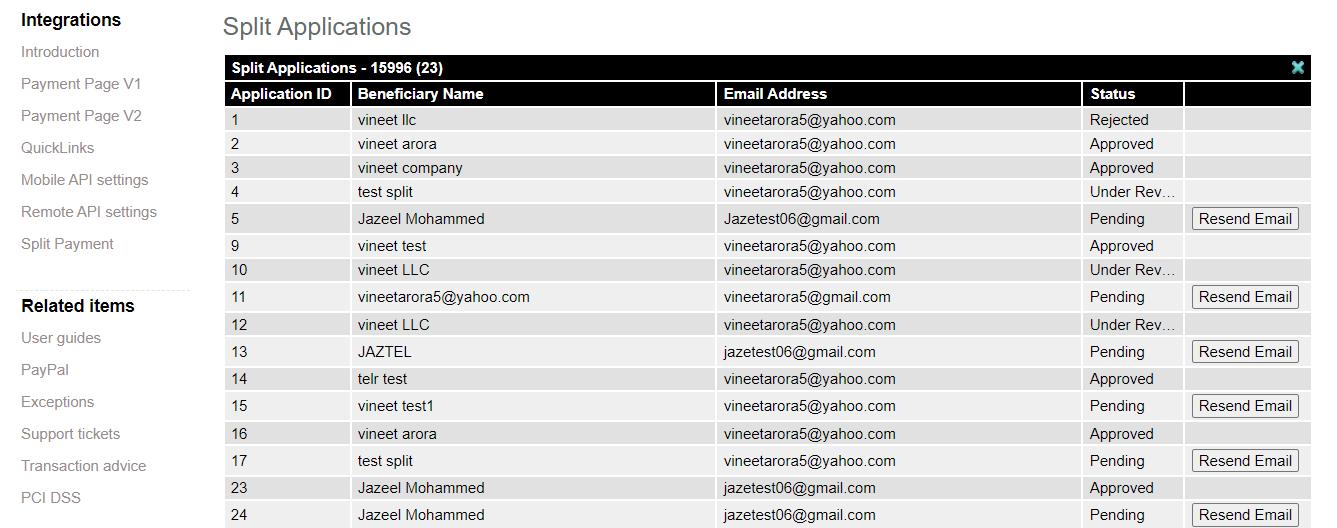
- Once a Sub-Merchant is created, an application is added under the "KYC Application" section with the following details:
- Application ID (Unique Identifier)
- Sub-Merchant Name
- Email ID (Sub-Merchant's Email ID)
- Status
- On the ‘Split Payment Details’ page in the Merchant Admin, the following three buttons will be available:
-
Add (To add a new entry into the system)
-
KYC Applications (Displays the status of the Sub-Merchant's KYC entry)
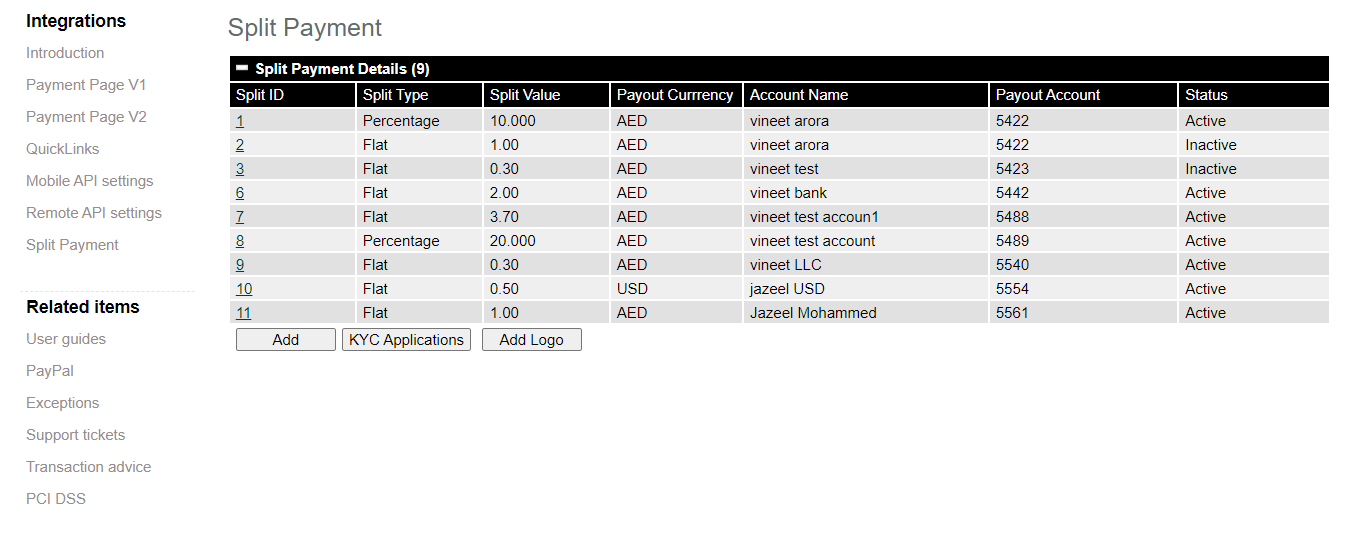
- Add Logo (Allows the merchant to upload their logo, which will be displayed on the Sub-Merchant Application page.)
- After the application is approved by Telr a unique Split ID is generated and displayed on the merchant dashboard with the following details:
- Split ID (Sub-Merchant Unique ID)
- Split Type (Percentage or Flat)
- Split Value
- Payout currency
- Account Name
- Payout Account
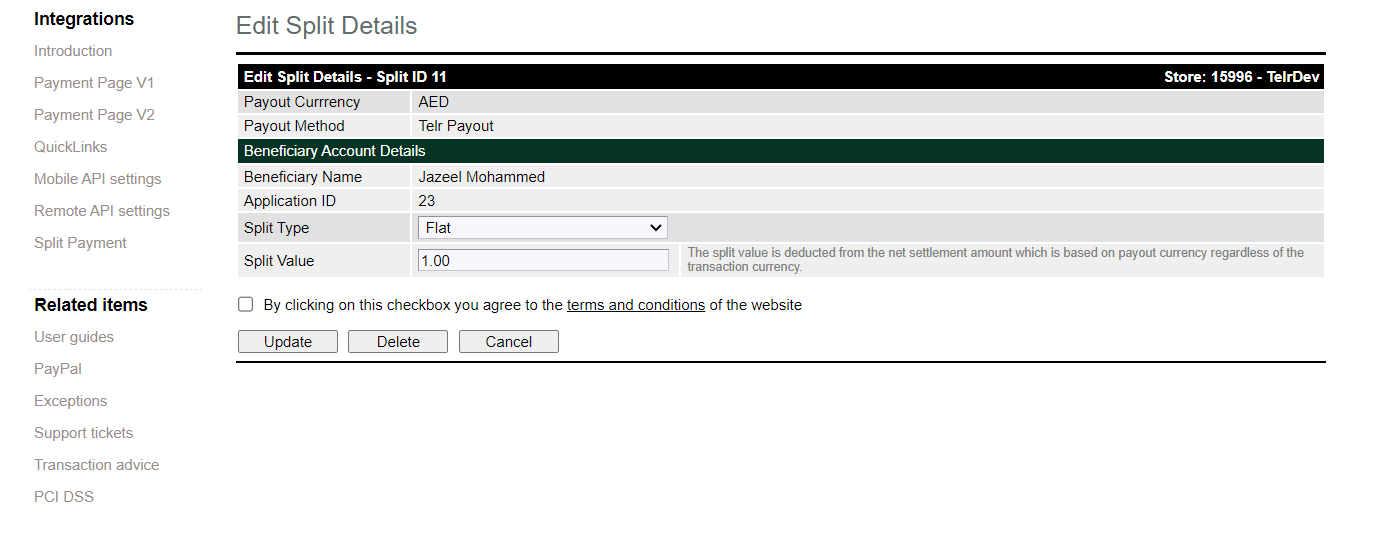
- Sub-merchant entry “Delete option”:
If the merchant opens a Split ID, they will see a Delete option. Using this button, they can deactivate the existing Split ID. (Refer to the screenshot below for details.)
User permission for split payment option
- Additional permissions are required for Merchant Admin users to provide access to the Split Payment option. This ensures that only authorized users can manage split payments.
Payouts and Split details entries in the system:
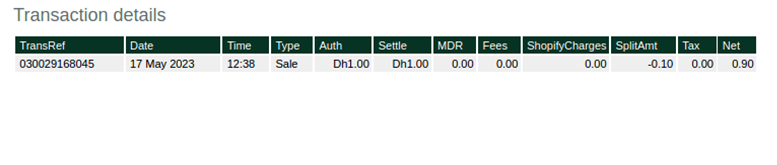
- In the Accounts section, a new column called SplitAmt has been added to display split payment details in both the Pending Transactions and Transaction Details entries.
- The SplitAmt column will show the split value allocated to the Sub-Merchant for each transaction.
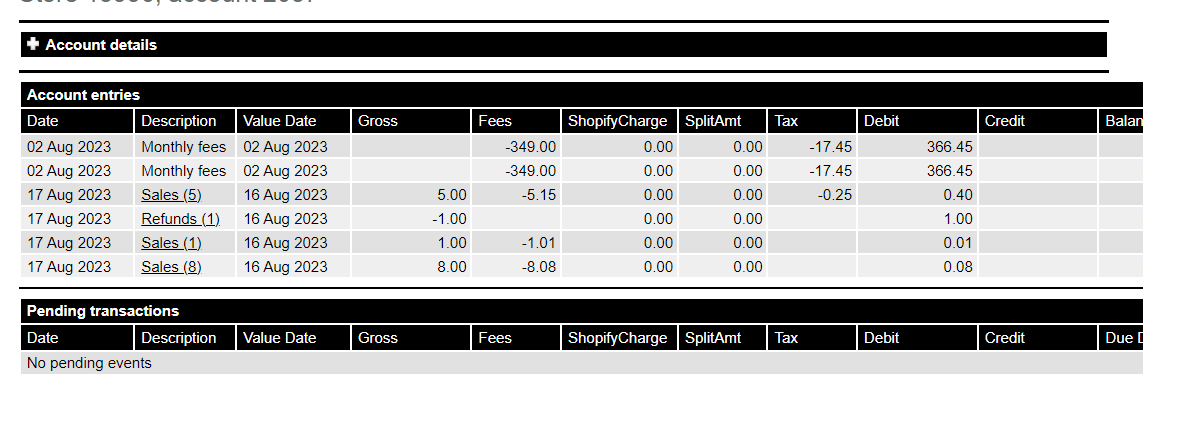
- The transaction flow will proceed as usual. After the transaction is completed, its details will be recorded in the Payout History under the Accounts tab in the Merchant Admin.
- The transaction amount will be distributed and settled between the Merchant and Sub-Merchant accounts as specified during the creation of the Split Payment ID.
- Payout fees will be deducted from the primary merchant’s settlement account.
- The payout interval (monthly, weekly, or same as the primary merchant) can be configured during the application creation process.