
Telr Odoo Extension facilitates seamless integration for merchants operating on the Odoo platform, enabling them to incorporate Telr Hosted Payment Pages into their E-commerce websites. The integration process outlined below provides a step-by-step guide for merchants to integrate Telr with their Odoo-hosted websites.
Version Requirement
Ensure your Odoo version is v16, v17 or v18, as the extension has been rigorously tested and optimized for compatibility with Odoo v16, v17 and v18.
Download
Access the Telr Odoo extension by downloading it from the following link:
https://github.com/orgs/Telr-PG/repositories
Process to Enable Telr Payment Gateway
Follow these steps to activate Telr Payment Gateway on your Odoo website. Please note: it is essential to back up your system before proceeding with the installation.
-
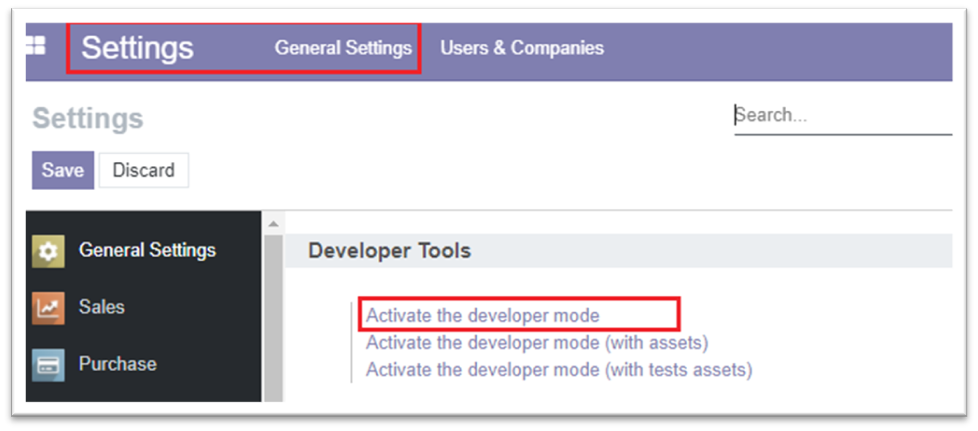
Activate Developer Mode:
a) Log in to the Odoo Admin Portal.
b) Navigate to Settings > General Settings.
c)Activate the developer mode to initiate the integration process.
- Install Custom Add-On:
To successfully integrate the Telr Odoo Extension, follow these steps:
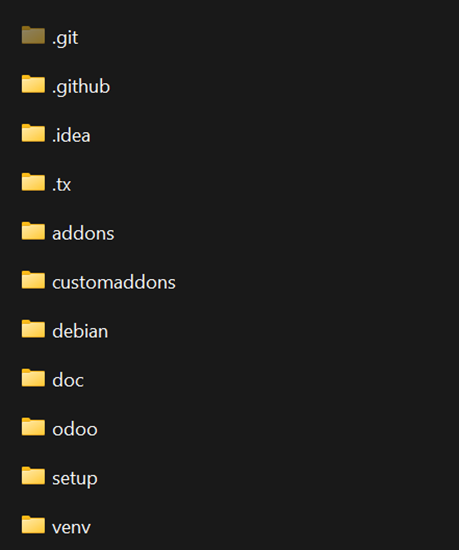
a) Extract the contents of the downloaded zip file.
b) Copy the extracted files into the "/customaddons" folder.
c) The "/customaddons" folder should be located in the root directory of your Odoo installation.
d) If the "customaddons" directory does not exist, create it in the root directory.
e) In the “debain/odoo.conf” file, specify the path to the "customaddons" directory under the "addons_path" variable.
f) Restart the Odoo server to apply the changes.

- Activate Custom Add-On:
To activate the Telr Odoo Extension on your Odoo platform, follow these steps:
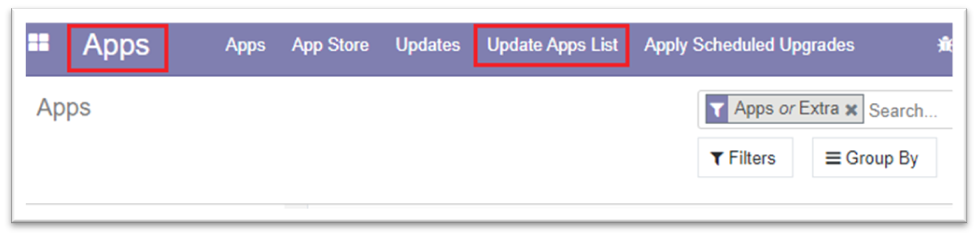
a) Navigate to the "Apps" section in the Odoo Admin Portal.
b) Click on "Update Apps List" to ensure the latest additions are reflected.
c) Locate the newly uploaded "Telr Payment Gateway" custom add-on in the Apps list.
d) Install the add-on by selecting it and following the installation prompts.
- Activate payment mode: (For v17)
Navigate Website > Configuration > eCommerce > Payment method > Card > Configuration and search “Telr Payment” option in “Supported by” and selected.
The payment provider depends on other add-ons like "Generic - Accounting", "Sale", "eCommerce", “Website”, please install these required dependencies in advance.
Streamlining Odoo Configuration
To seamlessly integrate Telr Hosted Payment Pages into your E-commerce website on the Odoo platform, please follow these simple configuration steps:
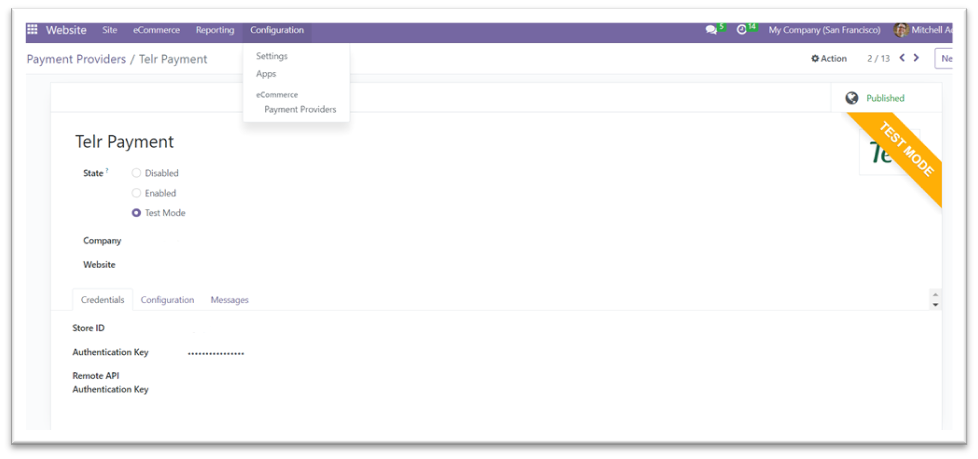
a) Navigate to Odoo Admin System:
- Go to Website > Configuration > eCommerce > Payment Providers.
- Click on the "Telr Payment" option.
b) Adjust Payment Method Settings:
- Edit the settings for the payment method.
- For testing purposes, select the "Test Mode" state. For live transactions, choose the "Enable" option.
- In the Credentials tab, input your Telr Store ID and Authentication Key.
- Telr Store ID: This numeric ID is visible in the top right corner of the Telr Merchant Administration System. Copy only the numeric part, excluding the full store name.
- Authentication Key: Retrieve this key from the Telr Merchant Administration System, specifically in the Hosted Payment Page V2 configuration page under the Integrations menu.
b) Configuration Tab (Optional):
- In the Configuration Tab, you have the flexibility to set optional fields, including payment mode, payment language, and payment transaction mode.
Ensuring Secure Live Transactions with IP Whitelisting
To guarantee the security of live transactions through Telr Hosted Payment Pages, it is imperative to whitelist the IP addresses of your server system in the Telr Merchant Administration System. Follow these steps for a seamless process:
a) Access Telr Merchant Administration System:
- Log in to the Telr Merchant Administration System.
b) Navigate to Payment Page V2 Configuration:
- Locate the Payment Page V2 configuration section in the system.
c) Update Server IP Addresses:
- Input and update the IP addresses of your server system within the designated fields.