Shopify is discontinuing the old API integration of Telr soon and merchants will not be able to
use Telr as payment gateway option. So, we have integrated Telr with Shopify’s new APIs and created a new “Telr” payment app.
Please follow the below sections to install “Telr” as new integration on Shopify to make
payments.
Steps to install Telr payment app
Login to the shopify merchant admin.
Option 1:
- Go to Settings > Payments, Then Click on ” Add payment methods”, Select “Search by provider”
and type “Telr” and click on Telr drop down.
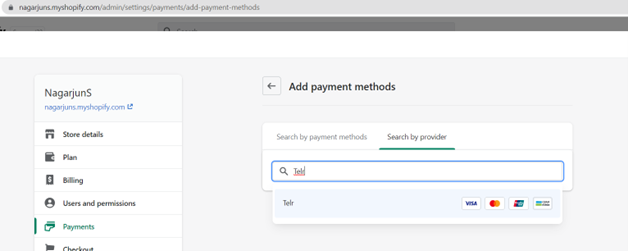
- Click “Activate” & Follow point ‘a’ mentioned below.
Option 2:
- Open another tab on the browser and paste the below installation link to install “Telr App” in
the store – https://accounts.shopify.com/store-login?redirect=settings%2Fpayments%2Falternativeproviders%2F3211265
Below are the screenshots which can be referred –
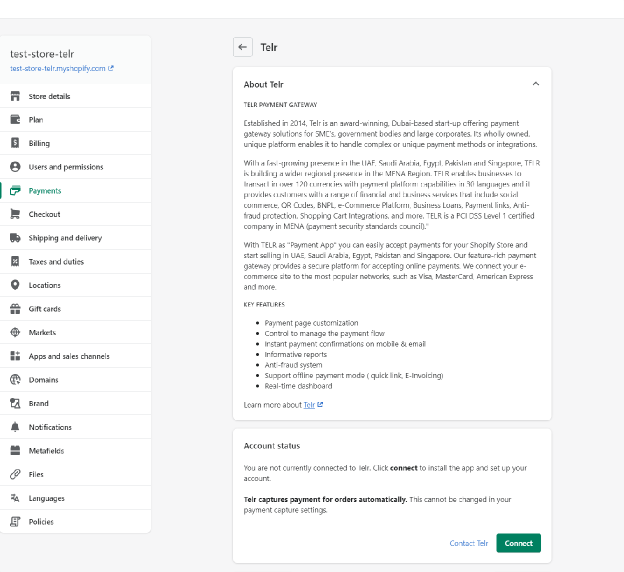
a) Click on connect button.
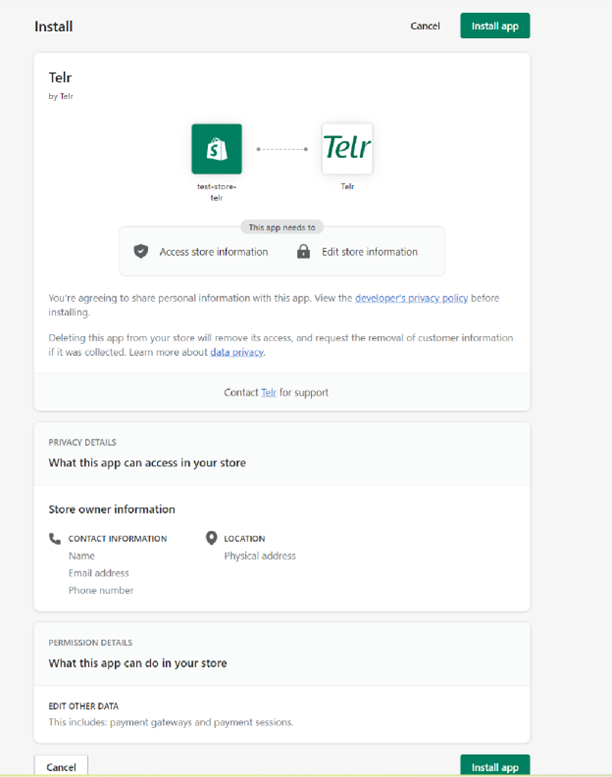
b) Click on Install App button
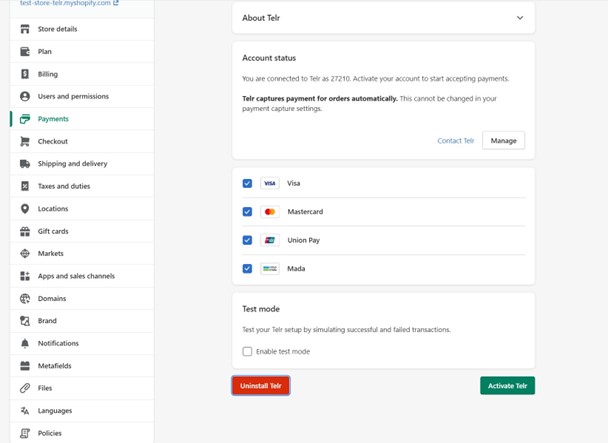
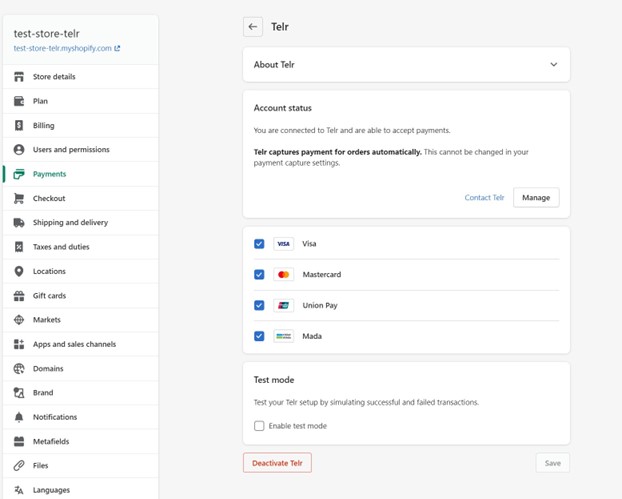
c) Click on “Manage” button , it will redirect to Telr merchant dashboard.
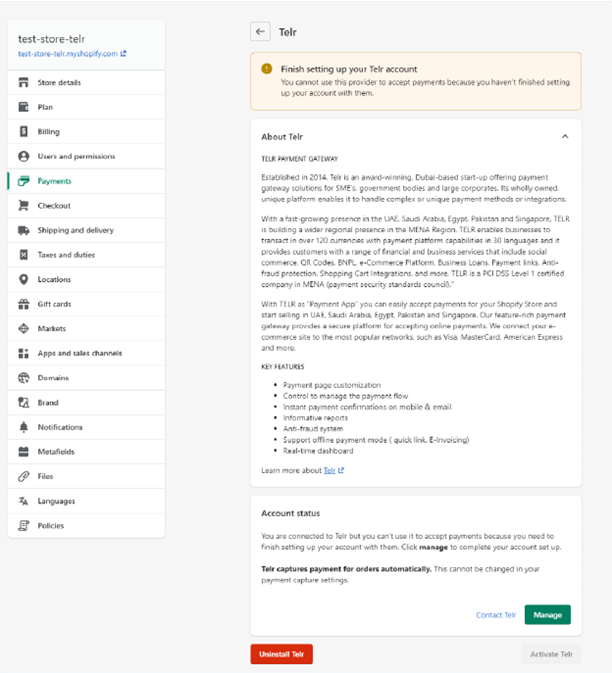
d) Login to Telr merchant dashboard - https://secure.telr.com/merchant/> and follow below
steps -
- Click Integration tab & select "Hosted Payment Page" from left panel
- Click configuration.
- Under "Shopify configuration" section, Fill the "Shopify domain name". eg: "test-store.myshopify.com".
- Click update.
e) Refresh the browser page ( in point c) above ) & click on Activate button
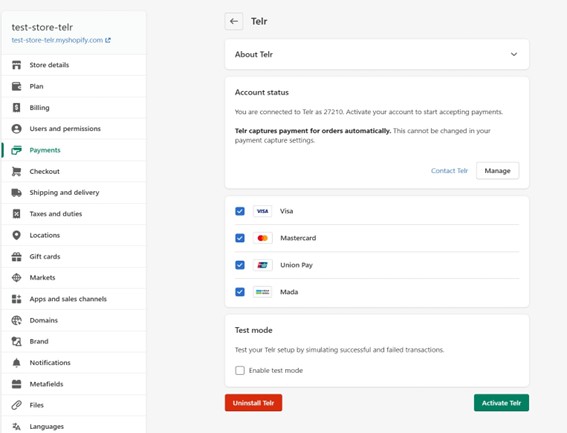
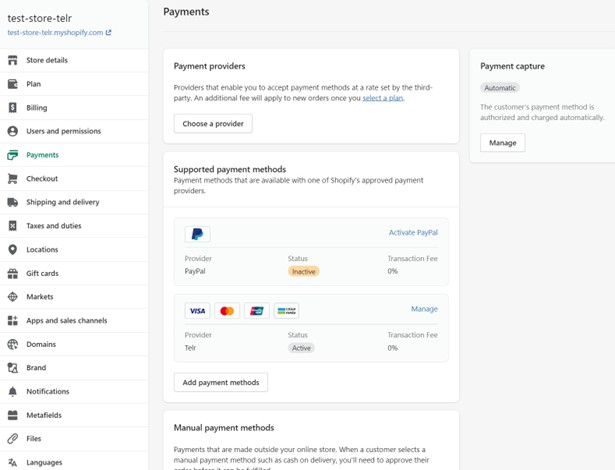
f) Check in Settings -> Payments, “Telr” name would start appearing
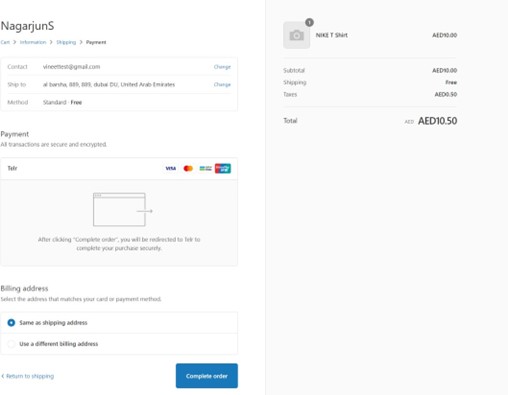
g) Use “Telr” as payment option to make payment for different orders –
Adding domain Name in sysadmin
This section is only required if merchant is not transacting from Shopify but transacting from his own website. In this case, please contact Telr Support ( [email protected]) with your domain name & store details.
Steps to un-install Telr payment app
- Check in Settings -> Payments and click on “Manage” in front of “Telr” and then click
“Deactivate Telr”
- Now click on “Uninstall Telr”
